Home » Uncategories » How Make Bun Hair / Easy Messy Bun Tutorial - YouTube
Friday, July 16, 2021
How Make Bun Hair / Easy Messy Bun Tutorial - YouTube
How Make Bun Hair / Easy Messy Bun Tutorial - YouTube. 1 minute easy everyday messy bun hairstyle | easy updo for long to medium hairin this video, i will show you easy messy bun hairstyle. Take a section from the back and coil it around the base to create a bun. If you want a side bun, gather your hair to the right or the left instead of right in the center. Slide one of the pins into your hair at the top of the ponytail, where the hair is gathered. Once the hair is fully twisted, bring the strand towards your head.
Trendy styles include low bun with braid, medium bun and bun with bangs. Make a low head ponytail and tuck it up thereby parting the hair and twisting it one or two times. Now, pull all your hair back to smoothen it down and create a neat look. Wrap the elastic around the handful of hair until there is no more slack. Wrap the hair into a bun.
Messy Bun Hairstyle Tutorial - AllDayChic from alldaychic.com Follow these steps carefully to make a low hair bun: If you want to go for a messier look, just comb your hair back with your fingers. If you want a side bun, gather your hair to the right or the left instead of right in the center. Now roll the tail of the pony along the rubber and secure the bun with bobby pins. Brush your hair out to make it detangled (wash it for better results). Combine both the braids and comb hair once again before making a bun. This daily hair bun model is quite simple to make. Before you start working on your hair it's important to gather all the items you'll need beforehand to make the entire process easier.
The magic bun maker really does deserve it name and will change the lives of everyone from 8 to 80 who has ever had to make a bun in either.
This bun is intended for a. The magic bun maker really does deserve it name and will change the lives of everyone from 8 to 80 who has ever had to make a bun in either. Most buns will be in between the crown of your head and the center of the back of your head. Texturize your roots, brush your hair into a ponytail, and secure with a hair elastic. To make a hair bungee, slip two bobby pins onto a hair elastic. Take a section from the back and coil it around the base to create a bun. Run your fingers through your hair and bunch all of your hair to the area where you want the man bun to be. You want this style to look perfectly pulled together. Similarly, begin to do braid from beneath section of the hair as well, towards the upper portion. Use a ponytail holder to secure it tightly in place. There are so many different variations of sleep buns, messy buns, twisted bun, braided buns, spiral buns, etc. The twists make colors blend perfectly, so even if your extensions didn't match your hair color very well, the bun can turn out to be even more beautiful, with some great highlights and lowlights. 2 put your hair in a bun the size of an apple (depends on how long your hair is).
To make a hair bungee, slip two bobby pins onto a hair elastic. Take two equal parts from the front of your hair and secure it at the back of your head with a wire clip. Step 2) wrap the ponytail into a bun. This is a great protective style, and continues to be popular and gorgeous. Similarly, begin to do braid from beneath section of the hair as well, towards the upper portion.
How to Make a Simple Bun in Hair: 9 Steps (with Pictures) from www.wikihow.com Before you start working on your hair it's important to gather all the items you'll need beforehand to make the entire process easier. Wrap it in a circular motion around the head the same direction in which you twisted it. Take the help of an elastic and roll bun, as shown in the picture above. There are so many different variations of sleep buns, messy buns, twisted bun, braided buns, spiral buns, etc. Twist and tie the part of your hair right behind. Step 3) curl the hair in the front that's left out. Combine both the braids and comb hair once again before making a bun. The magic bun maker really does deserve it name and will change the lives of everyone from 8 to 80 who has ever had to make a bun in either.
Before you start working on your hair it's important to gather all the items you'll need beforehand to make the entire process easier.
Take two equal parts from the front of your hair and secure it at the back of your head with a wire clip. Similarly, begin to do braid from beneath section of the hair as well, towards the upper portion. Twist and tie the part of your hair right behind. If you want a side bun, gather your hair to the right or the left instead of right in the center. Step 1) section the hair across the head from ear to ear; While most bun hairstyles can be strategically messy, the chignon bun is an exception. Now, this is where you things switch up a bit. If you want to go for a messier look, just comb your hair back with your fingers. How to make diy fabric hair bun maker and holder.you can make a hair bun like magic in a few minutes with just some scrap fabric, craft wire and a few simple. As you twist your hair loosely into a bun, pin your hair section by section to keep your strands in place. Wrap the hair into a bun. After a few wraps, slide the other bobby pin in toward the center of your ponytail to pin the elastic in place. The twists make colors blend perfectly, so even if your extensions didn't match your hair color very well, the bun can turn out to be even more beautiful, with some great highlights and lowlights.
Now, this is where you things switch up a bit. Take the help of an elastic and roll bun, as shown in the picture above. Part your hair into four equal sections, two on either side of the front and two on either side of the back. There are so many different variations of sleep buns, messy buns, twisted bun, braided buns, spiral buns, etc. This bun is intended for a.
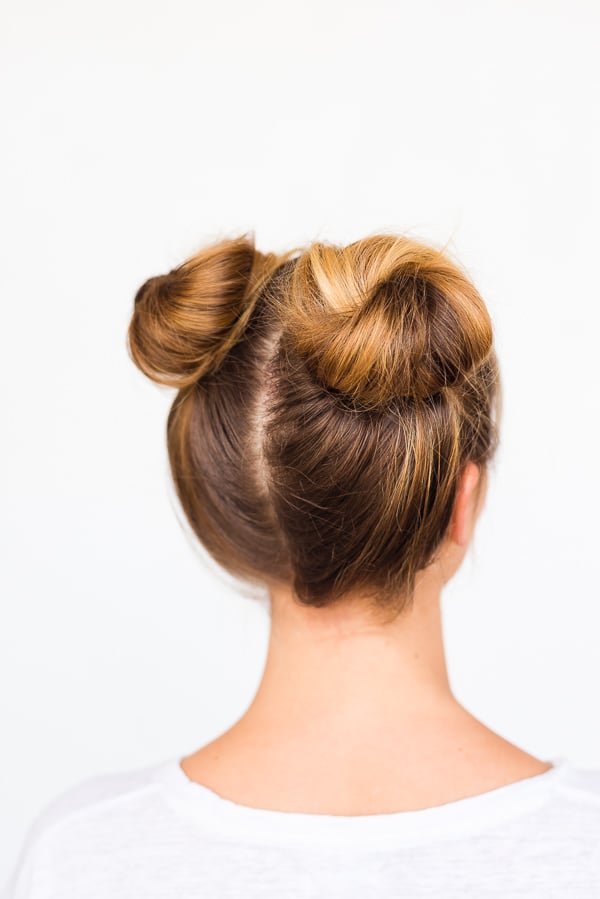
Two Buns Are Better Than One: Double Bun Hair Tutorial from www.papernstitchblog.com Take two equal parts from the front of your hair and secure it at the back of your head with a wire clip. Gather your hair at the nape of your neck. Most buns will be in between the crown of your head and the center of the back of your head. Run your fingers through your hair and bunch all of your hair to the area where you want the man bun to be. This will include all the hair on the back and sides of your head as well. These cool buns can also be done in different ways for different occasions. Grab a section of hair from the crown area and make a fishtail braid from the beginning. Use a ponytail holder to secure it tightly in place.
Make a low head ponytail and tuck it up thereby parting the hair and twisting it one or two times.
Take the help of an elastic and roll bun, as shown in the picture above. The magic bun maker really does deserve it name and will change the lives of everyone from 8 to 80 who has ever had to make a bun in either. 1 minute easy everyday messy bun hairstyle | easy updo for long to medium hairin this video, i will show you easy messy bun hairstyle. Grab a section of hair from the crown area and make a fishtail braid from the beginning. Now, this is where you things switch up a bit. Not every updo requires an expert's skill set. Texturize your roots, brush your hair into a ponytail, and secure with a hair elastic. To give your hair a fluffy look, spread your hair a little with your hands. If you want to go for a messier look, just comb your hair back with your fingers. Hair thickness is also important since your bun needs to have both density and volume. Slide one of the pins into your hair at the top of the ponytail, where the hair is gathered. 2 put your hair in a bun the size of an apple (depends on how long your hair is). If you want a side bun, gather your hair to the right or the left instead of right in the center.
0 Response to "How Make Bun Hair / Easy Messy Bun Tutorial - YouTube"


0 Response to "How Make Bun Hair / Easy Messy Bun Tutorial - YouTube"
Post a Comment